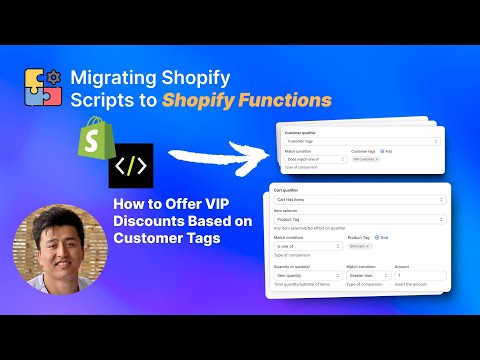
How to Offer VIP Discounts Based on Customer Tags in Shopify
Rewarding your most valuable customers with exclusive pricing is one of the most effective retention strategies in ecommerce. Instead of relying on discount codes that anyone can share, you can use Shopify customer tags combined with PowerX Functions Creator to automatically apply VIP pricing at checkout — no codes required, no manual intervention, and no risk of discount leakage.
What You’ll Learn in This Video
Section titled “What You’ll Learn in This Video”- How to use Shopify customer tags to segment VIP, wholesale, and employee customers
- Setting up automatic discounts with customer qualifiers in PowerX
- Configuring different discount tiers for different customer tags
- Creating tag-based order discounts that apply without codes
Step-by-Step Guide: Tag-Based VIP Discounts
Section titled “Step-by-Step Guide: Tag-Based VIP Discounts”Understanding Customer Tags in Shopify
Section titled “Understanding Customer Tags in Shopify”Customer tags are labels you assign to customer accounts in your Shopify admin. They are one of the most underutilized features in Shopify because, natively, tags are mostly organizational — they help you filter and segment customers in your admin panel, but they do not trigger any automatic behavior at checkout.
PowerX changes this by reading customer tags at the moment of checkout and using them to determine which discounts apply. This turns passive organizational labels into active pricing logic.
You can assign tags manually in the Shopify admin under Customers > [Customer Name] > Tags, or automate tagging using Shopify Flow, loyalty apps, or third-party integrations. Common tags include “VIP,” “wholesale,” “employee,” “ambassador,” and tier-based labels like “gold,” “silver,” and “bronze.”
Creating Automatic VIP Discounts
Section titled “Creating Automatic VIP Discounts”Here is how to set up tag-based VIP pricing that applies automatically:
-
Tag your customers. In Shopify admin, go to Customers and add the appropriate tag (e.g., “VIP”) to qualifying accounts. If you have many customers to tag, use Shopify’s bulk editing features or set up automated tagging through Shopify Flow based on criteria like total spend or order count.
-
Create a new campaign in PowerX. Navigate to Order Discounts and create a new campaign. Name it clearly — “VIP Automatic Discount” or “Customer Tag Pricing.”
-
Add a customer qualifier. Under the campaign conditions, add a customer qualifier and set it to “Customer has tag” with the value “VIP.” This ensures only customers with that tag receive the discount.
-
Set the discount amount. Choose percentage or fixed amount. For VIP customers, a 15% automatic discount is common. Set the discount title to something the customer will see at checkout, like “VIP Member Discount.”
-
Set the trigger to automatic. Unlike code-based discounts, VIP discounts should apply automatically when a tagged customer is logged in and checks out. No code entry means no friction and no risk of the code being shared publicly.
-
Activate and test. Log in with a customer account tagged “VIP” and verify the discount appears automatically at checkout. Test with a non-tagged account to confirm the discount does not appear.
Building Multi-Tier Customer Pricing
Section titled “Building Multi-Tier Customer Pricing”The real power of tag-based discounts emerges when you create multiple tiers. Instead of a single VIP level, you can build a full tiered pricing structure:
- “VIP” tag — 15% off all orders automatically
- “wholesale” tag — 25% off, applied to order subtotal
- “employee” tag — 30% off with a monthly cap
- “ambassador” tag — 20% off plus free shipping (combine with a shipping discount campaign)
Each tier is a separate campaign in PowerX with its own customer qualifier. Because each campaign targets a different tag, there is no conflict — a customer with the “wholesale” tag only receives the wholesale discount, while a “VIP” customer gets the VIP rate.
For customers who might have multiple tags, PowerX’s application strategy settings let you control whether discounts stack or only the best one applies. The “Maximum discount” strategy is the safest default.
Combining Tags with Product Targeting
Section titled “Combining Tags with Product Targeting”You can go further by combining customer tags with product-level targeting. For example, wholesale customers might get 25% off your entire catalog but 35% off a specific “Wholesale Favorites” collection. This is done by adding item selectors alongside the customer qualifier within the same campaign. Refer to the getting started guide for details on combining conditions.
Key Takeaways
Section titled “Key Takeaways”- Customer tags transform passive Shopify labels into active checkout pricing logic
- VIP discounts apply automatically when tagged customers are logged in — no codes needed
- Multiple tiers (VIP, wholesale, employee) can coexist as separate campaigns
- Tags can be assigned manually, in bulk, or automatically through Shopify Flow
- Combining customer tags with product selectors enables granular pricing control per segment
Frequently Asked Questions
Section titled “Frequently Asked Questions”How do customer tags work for VIP discounts?
Section titled “How do customer tags work for VIP discounts?”You assign tags like “VIP” or “wholesale” to customer accounts in Shopify, and PowerX automatically applies the corresponding discount when those customers check out. The tag acts as the trigger — when PowerX detects the tag on the logged-in customer, it applies the configured discount without any code entry.
Can I offer different discount amounts for different customer tags?
Section titled “Can I offer different discount amounts for different customer tags?”Yes, you can create separate campaigns where “VIP” customers get 15% off, “wholesale” gets 25% off, and “employee” gets 30% off — all automatically. Each campaign uses a customer qualifier to check for a specific tag, and each has its own discount amount.
Do customers need to enter a code to get VIP pricing?
Section titled “Do customers need to enter a code to get VIP pricing?”No, VIP discounts apply automatically when tagged customers are logged in — no discount code needed. This eliminates friction at checkout and prevents discount codes from being shared on coupon sites.
Video Series Navigation
Section titled “Video Series Navigation”This is Part 12 of our Shopify Functions Tutorial Series.
- Previous: How to Apply Different Discount Amounts with a Single Shopify Code
- Next: How to Migrate Shopify Scripts to Functions in 2025
Ready to reward your best customers with automatic VIP pricing?
- Install PowerX Functions Creator — free on development stores, 3-day free trial on paid plans
- Read the Customer Qualifiers documentation for all tag-based conditions
- Explore Order Discounts for order-level VIP pricing
- Follow the Getting Started guide for initial setup